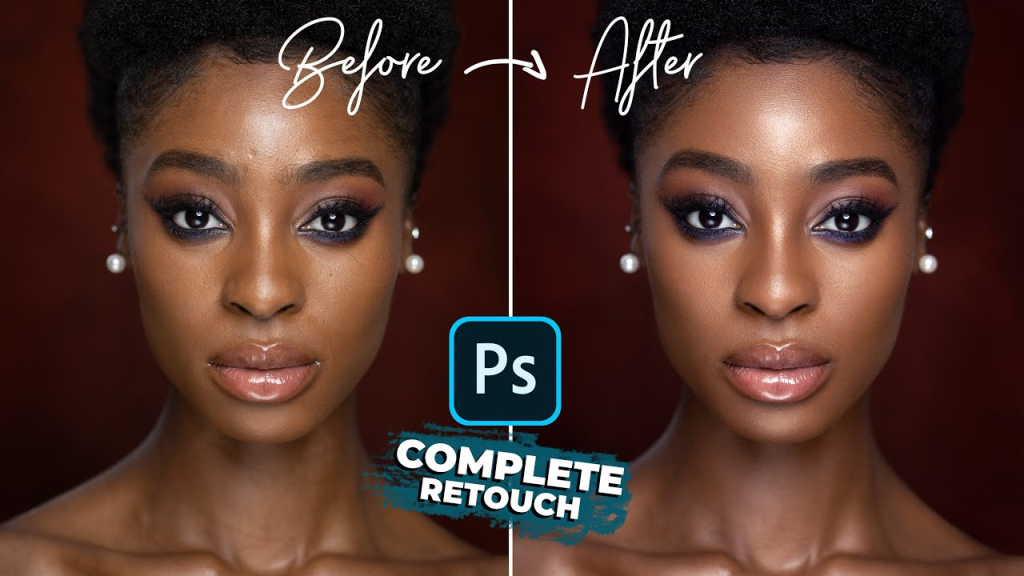
In today’s digital era, where visuals dominate social media platforms, websites, and personal portfolios, the skill of image retouching has emerged as essential. Adobe Photoshop is hailed as the premier software for refining and enhancing portraits, enabling photographers and designers to improve their subjects while preserving their natural appearance. Whether you’re a seasoned professional or an enthusiastic beginner, acquiring proficiency in the fundamentals of portrait retouching using Photoshop can significantly enhance your photography. In this article, we’ll delve into the foundational processes for attaining portrait excellence through meticulous retouching methods.

Before delving into the complexities of retouching, it’s crucial to configure your workspace for maximum efficiency. Begin by opening your portrait image in Photoshop. Next, create a duplicate layer by right-clicking on the layer and choosing “Duplicate Layer.” This duplicate layer acts as a safeguard, ensuring you can return to the original image if necessary.


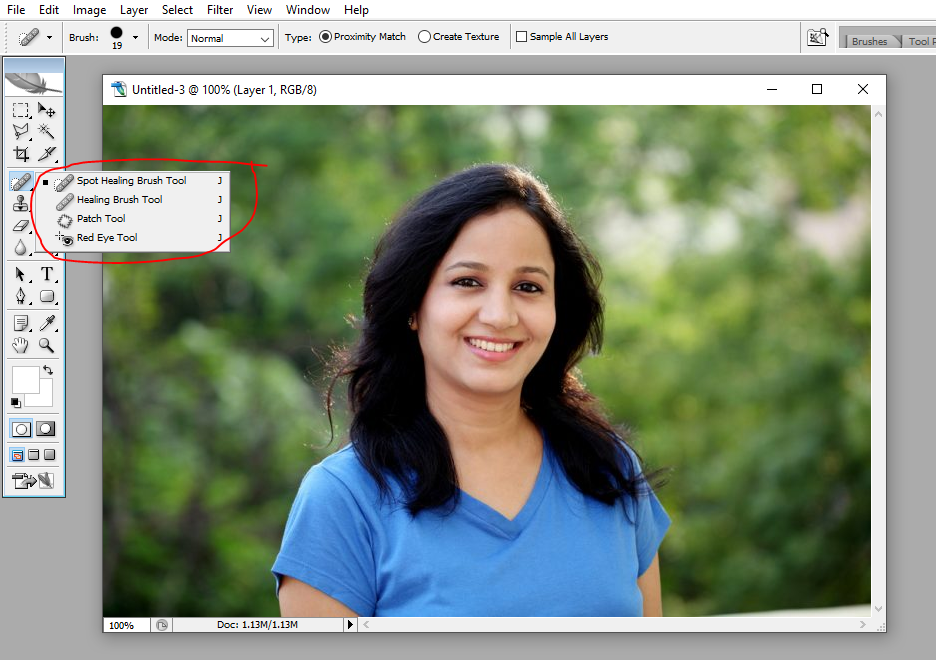
The Spot Healing Brush tool is indispensable for eliminating minor blemishes, spots, and imperfections from the skin. To utilize this tool effectively, first, select the Spot Healing Brush (J) from the toolbar. Adjust the brush size to match the area you’re retouching, then effortlessly click on the blemishes to seamlessly erase them. Alternatively, for larger imperfections, you may opt for the Healing Brush tool (J) to exercise more precise control over the retouching process.


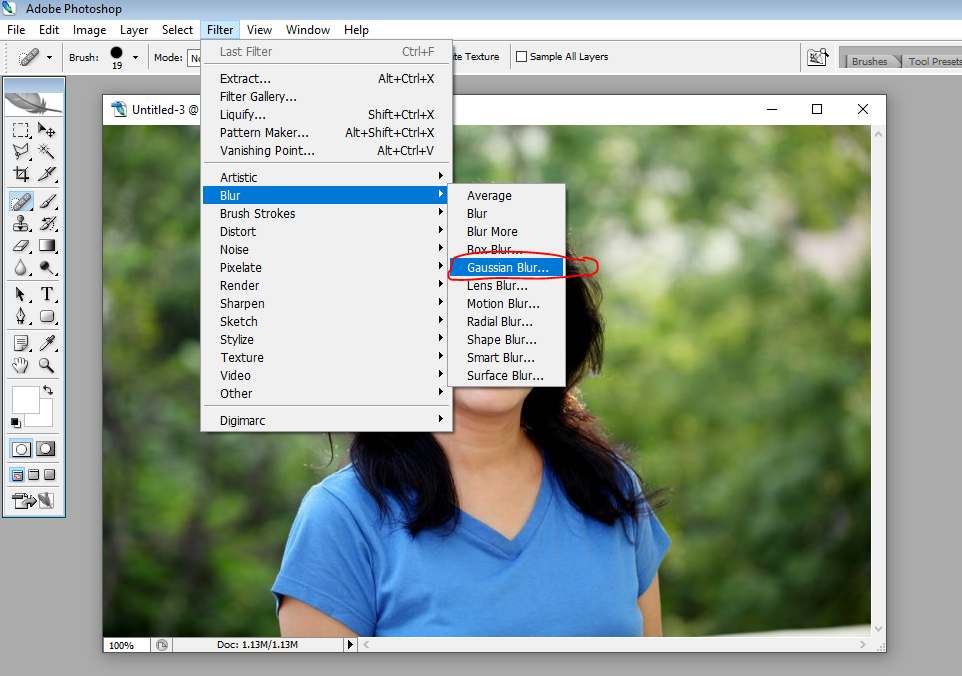
Creating a smooth and flawless skin texture is a key aspect of professional portrait retouching. To achieve this while maintaining crucial details, consider applying a subtle Gaussian Blur filter. Begin by duplicating the background layer once more. Then, navigate to Filter > Blur > Gaussian Blur and fine-tune the radius until you reach the desired level of softness. Subsequently, generate a layer mask and utilize a soft brush to paint over regions where you wish to preserve sharpness, such as the eyes, lips, and hair.

Color balance is a critical component of portrait retouching, as it greatly influences the overall appearance of the image. To improve skin tone and attain a more appealing complexion, incorporate a Color Balance adjustment layer. Adjust the sliders within the adjustment layer to fine-tune the highlights, midtones, and shadows, thereby achieving the desired warmth and vibrancy in the skin tone.


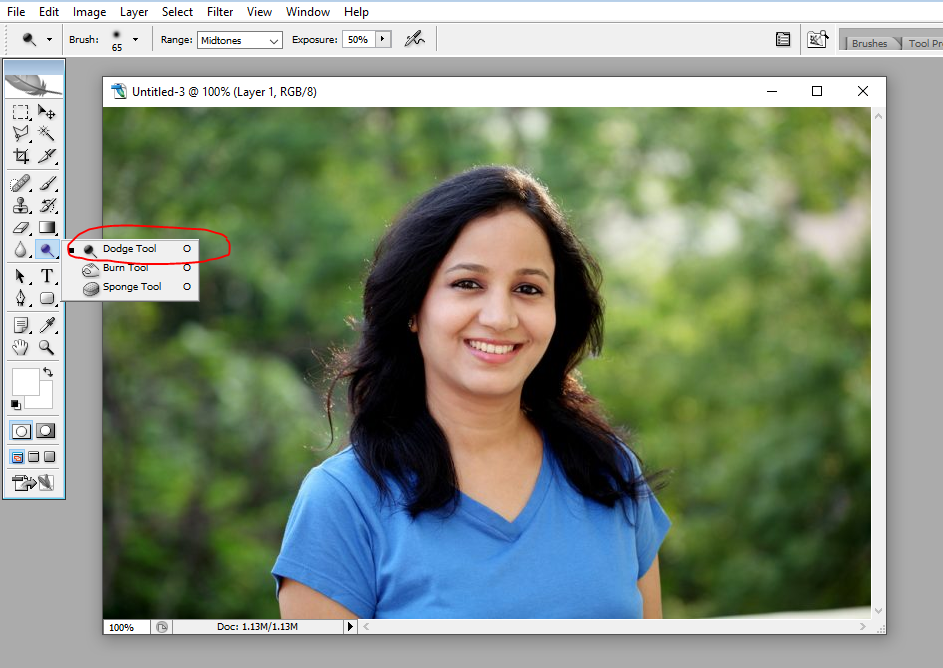
Dodge and Burn techniques are influential methods employed by artists to sculpt and define the subject’s features, enhancing depth and dimension in the portrait. Begin by creating a new layer set to Overlay blending mode. Utilize the Dodge Tool (O) to brighten areas you wish to highlight, such as the cheekbones, forehead, and nose bridge. Conversely, employ the Burn Tool (O) to darken areas for contouring, such as the sides of the nose, jawline, and neck.

After refining the skin texture, tone, and contours, proceed to make final adjustments to the overall image. Explore additional adjustments such as Levels, Curves, and Vibrance to fine-tune the brightness, contrast, and color balance. Remember to periodically zoom out to assess the image as a whole, ensuring that your retouching maintains a subtle and natural appearance.
Conclusion
Becoming proficient in portrait retouching in Photoshop is a process that demands patience, dedication, and a meticulous attention to detail. Through adhering to these foundational steps and exploring various techniques, you can elevate your portraits to a higher standard of excellence while maintaining the innate beauty of your subjects. It’s essential to keep in mind that the objective of retouching is not to distort reality but to enrich it, producing timeless portraits that engage and inspire viewers for generations to come.


Leave a Reply
You must be logged in to post a comment.